


The Mid Autumn Festival is almost upon us and that means MOONCAKES! Ok, traditionally, the Mid Autumn Festivals is the celebration of the harvest season, then it became about the moon and the rabbit, and now, sadly perhaps, it’s all about the mooncake…and the pomelo. I was never that big a fan of mooncakes as a child because I just didn’t like the taste of the lotus seed paste and would only eat the salted egg yolk in the mooncake, but I loved the little piglets in the plastic “cages”. Then I discovered snowskin mooncakes with all sorts of different fillings (alcohol mooncakes!) and I fell in love with mooncakes.
This year, I decided to make my own and in one afternoon, I made 3 different types, talk about overkill.
First up, Traditional Baked Mooncakes.
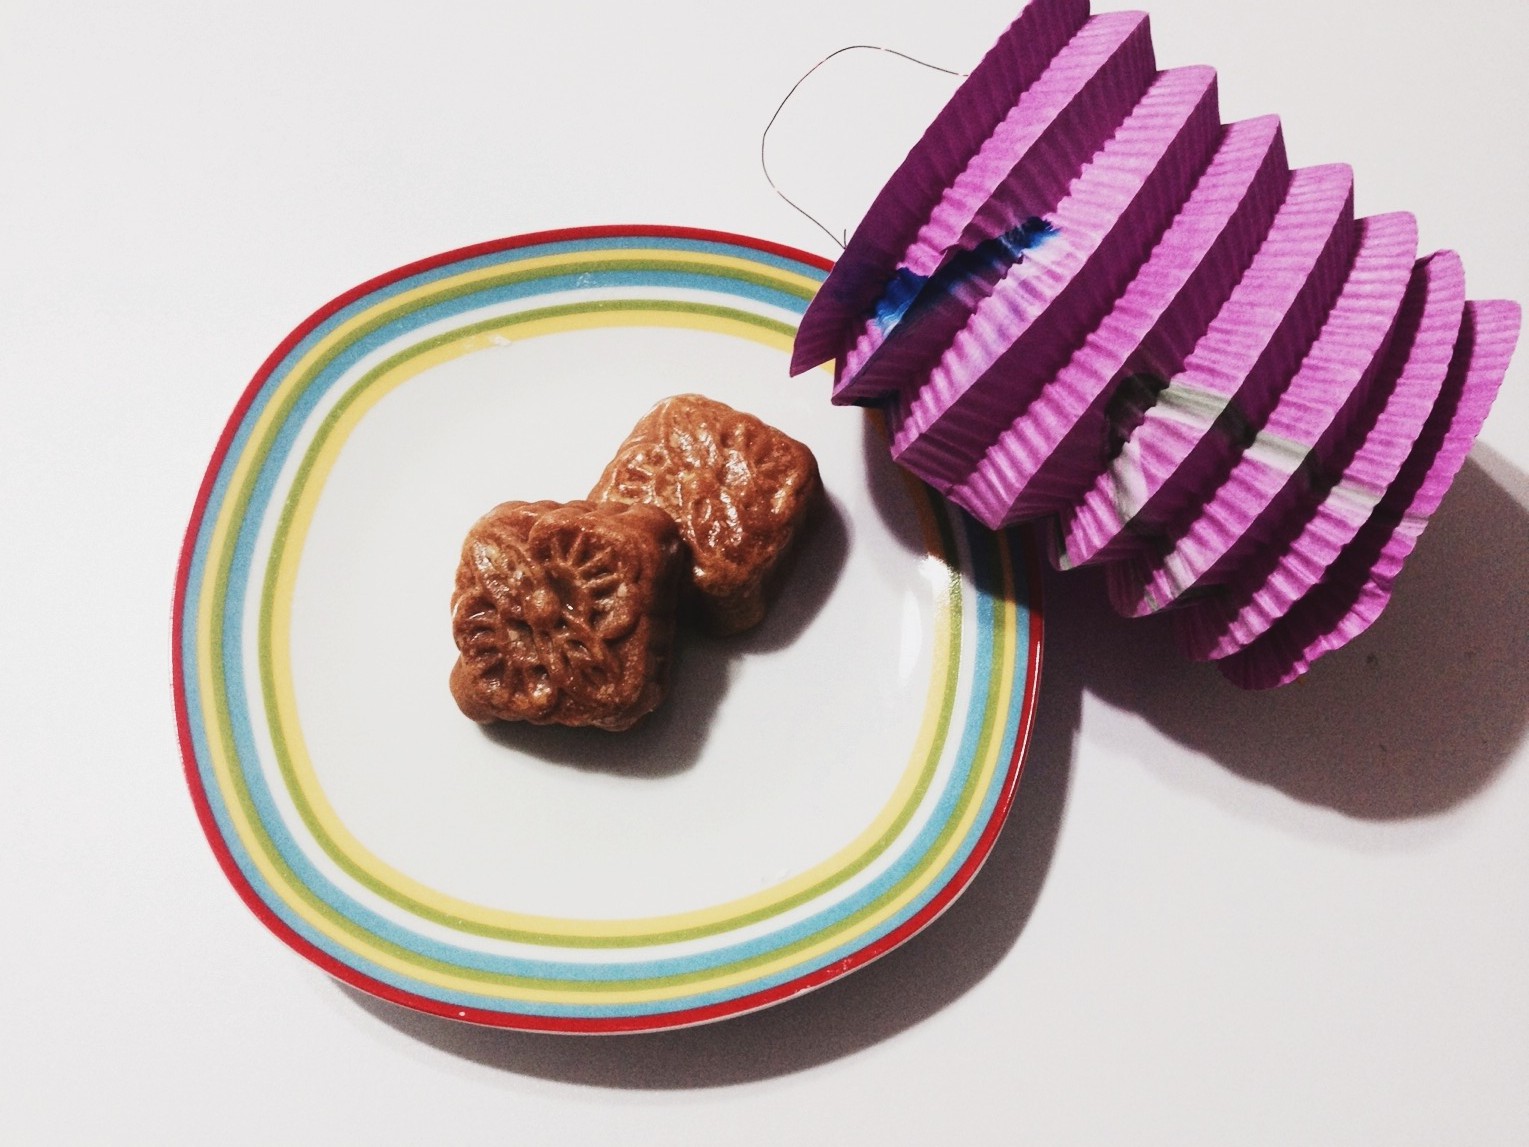
I followed the recipe from the Small Small Baker in its entirety and I really did like the results. When you’re done mixing the dough, it might feel like it will be too soft to hold its shape, but just let it sit for half an hour or so and after kneading it a little more, it definitely comes together. Do remember to sieve your egg wash, VERY IMPORTANT, otherwise the bubbles in the egg wash will cause bubbles on your mooncake and it won’t look that pretty anymore. While it’s not mentioned in the recipe, a video I watched had the lady spritzing some water on the mooncakes before the first bake. Last thing to note is that the mooncake may not look dark enough after the 15 minutes in the oven, but do not be tempted to bake it further because the colour develops into something darker as it cools.
Next, Baked Piggy Mooncakes:
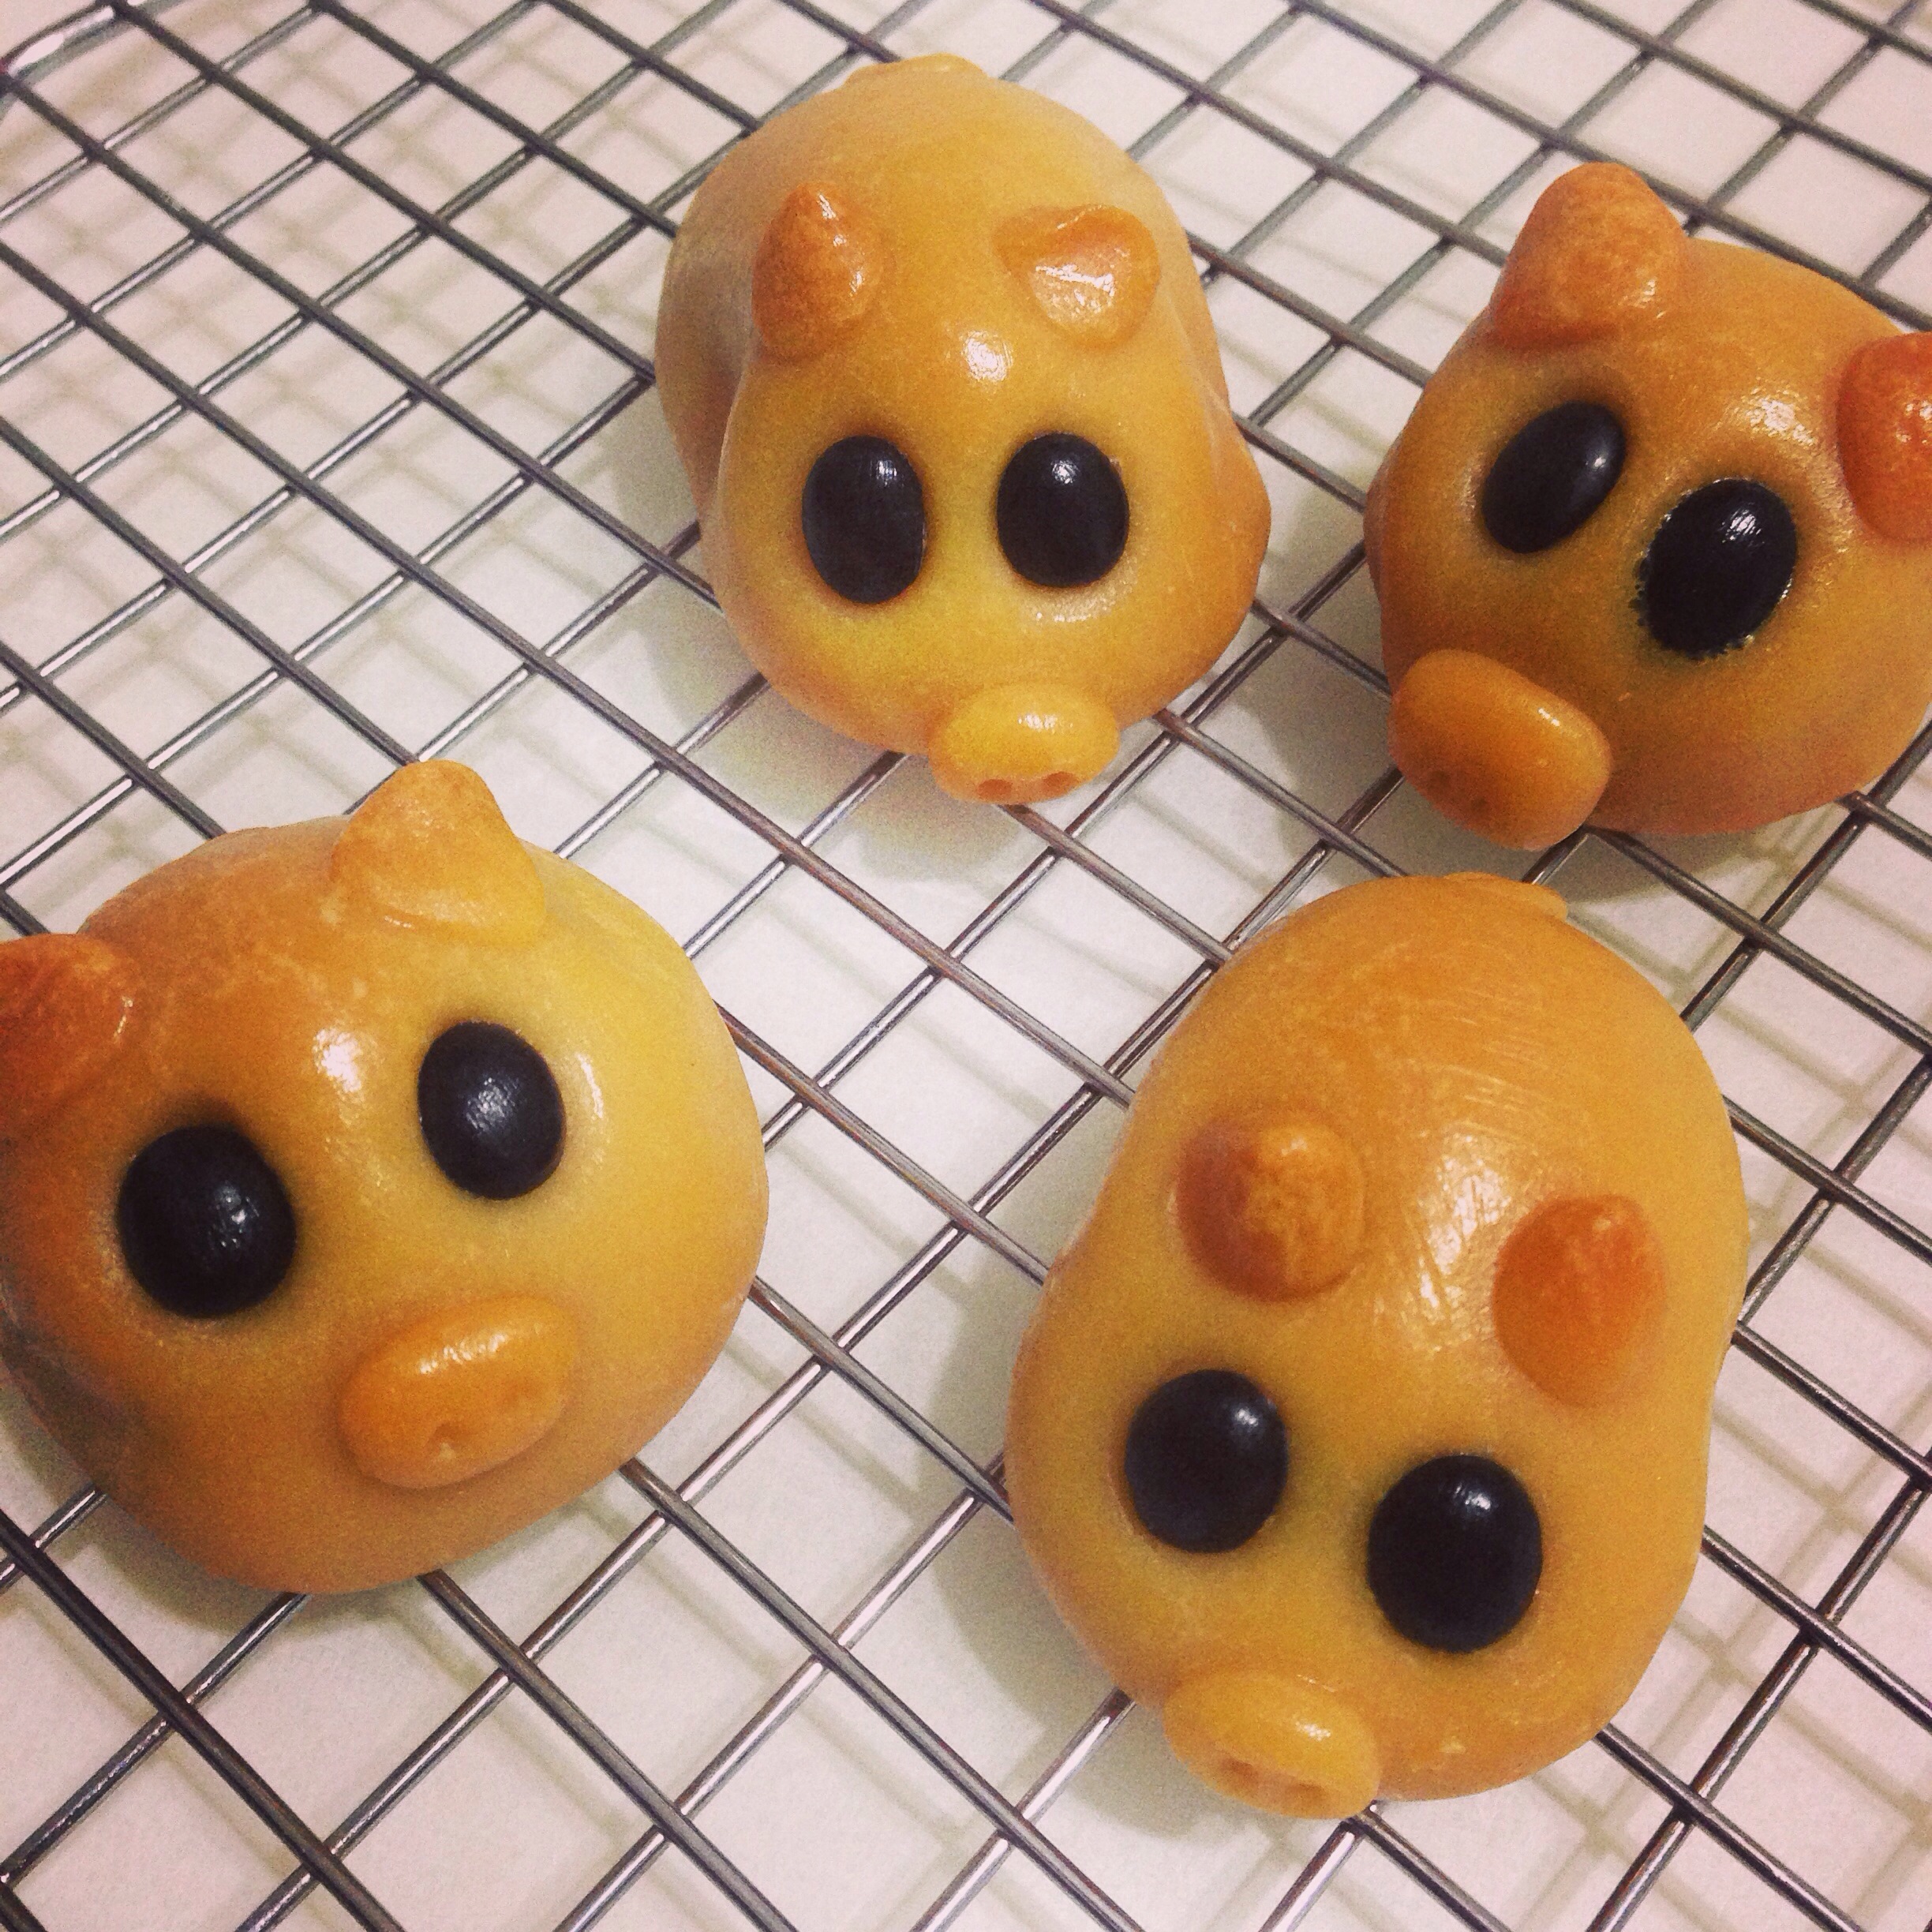
I basically used the same dough and hand-shaped them into these adorable piglets. Aren’t they the cutest? Unlike the traditional piglets, these have fillings in them.
Last, but not least, my favourite, Snowskin Mooncakes.
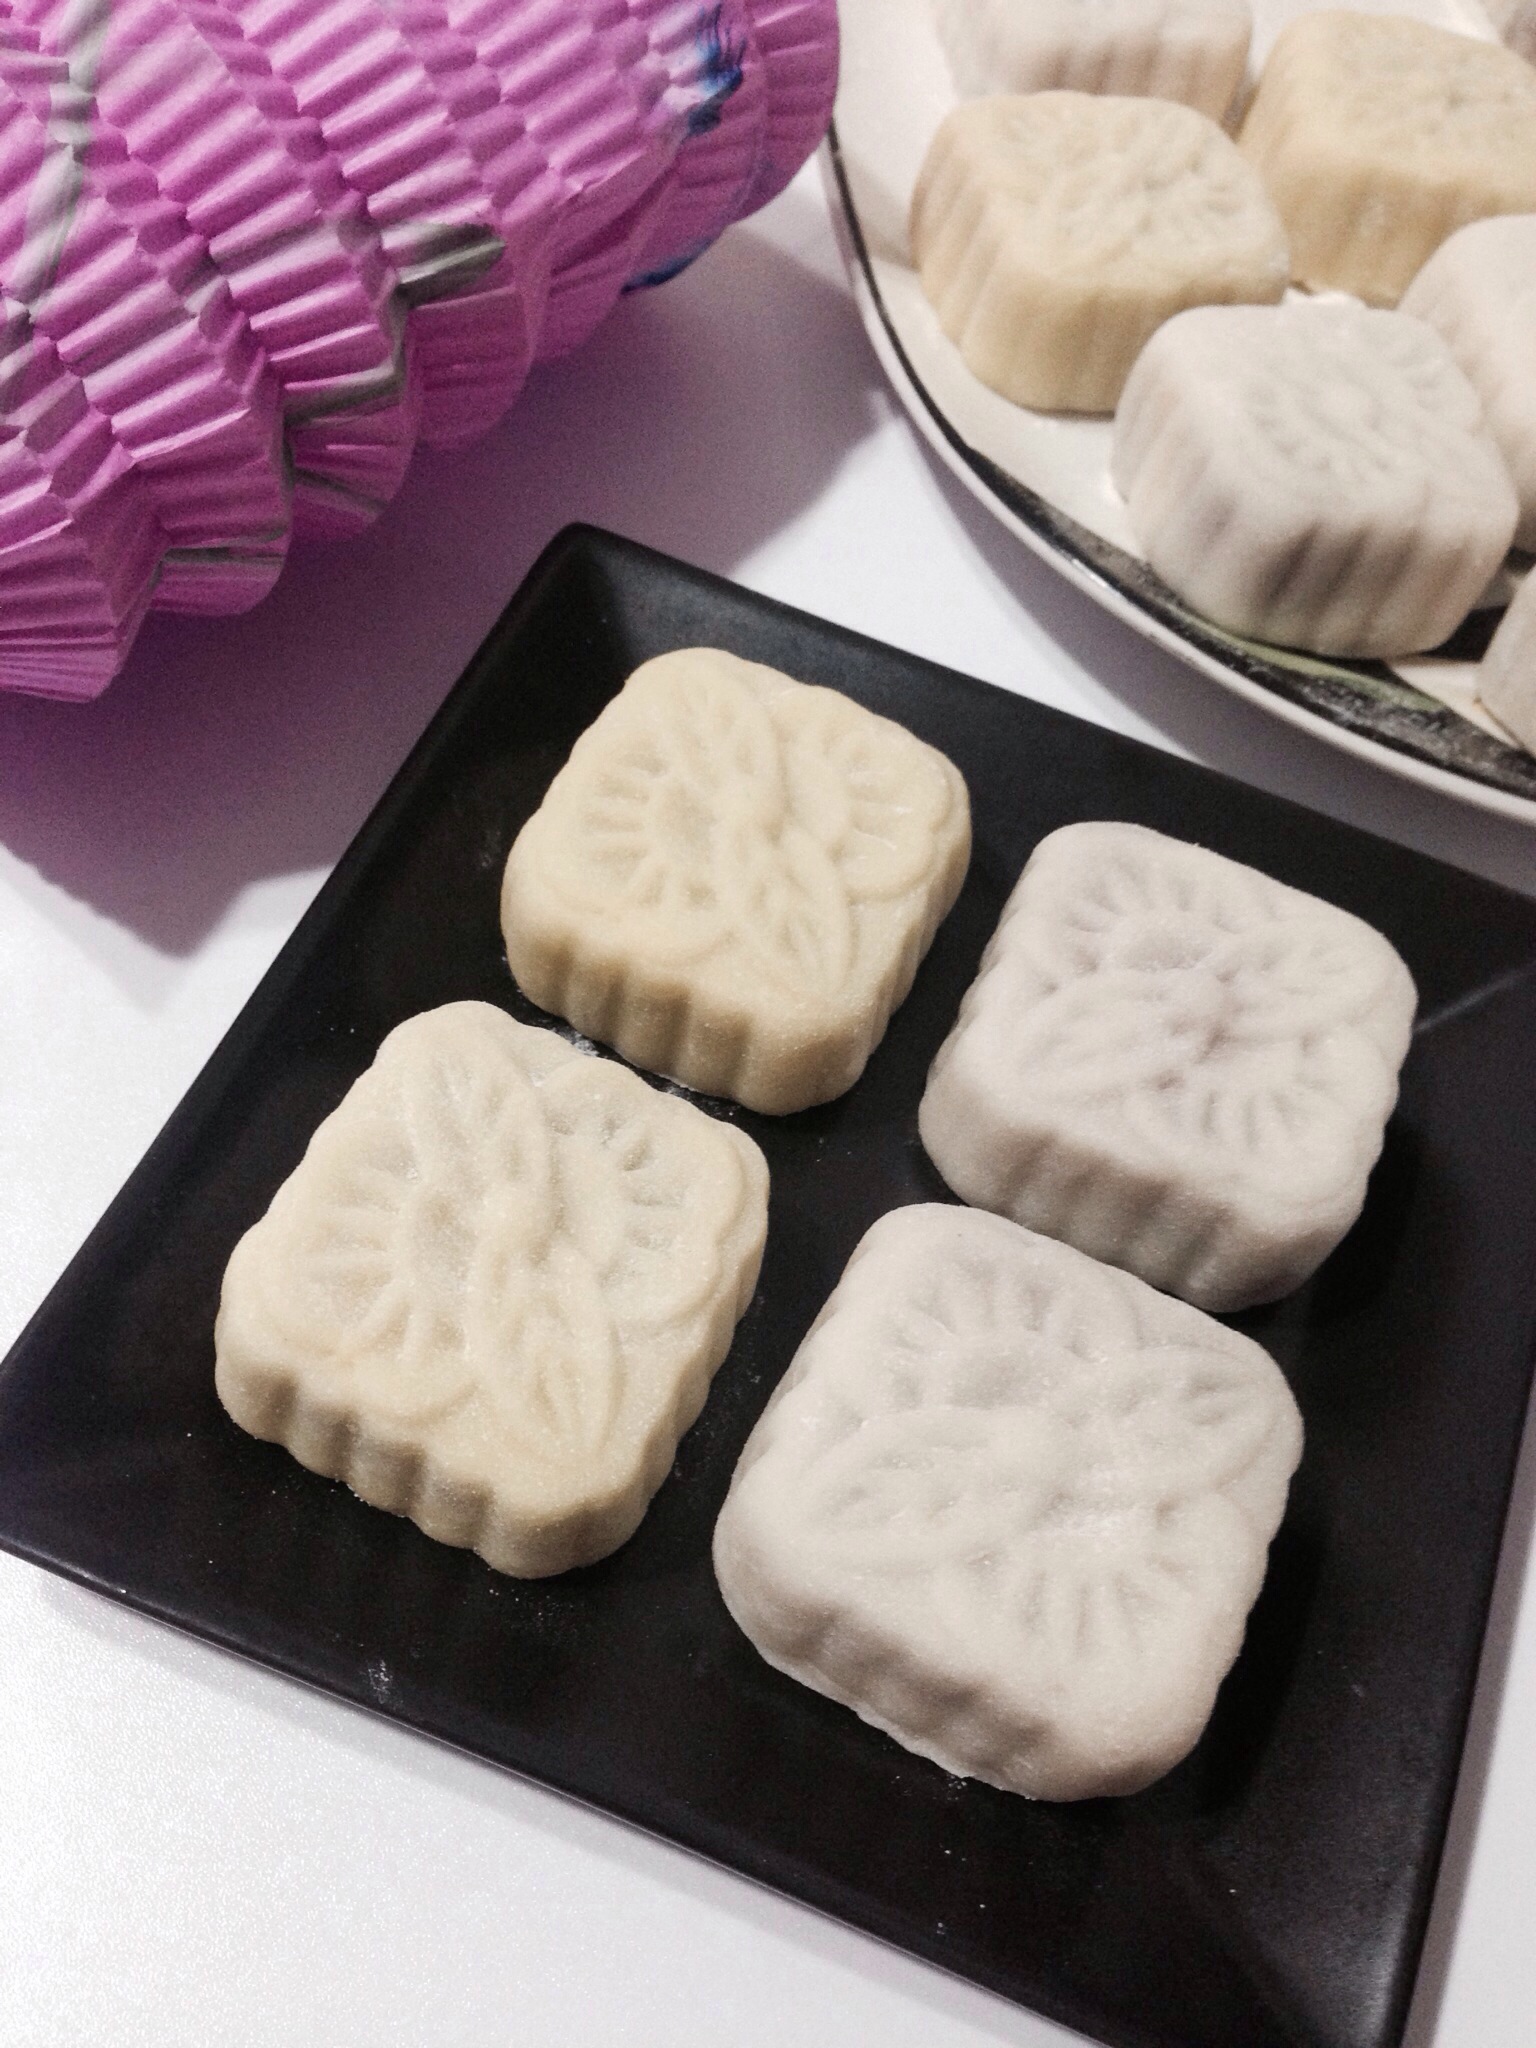
Recipe I used came from She Bakes and She Cooks. This recipe is slightly different from most as it requires Hong Kong flour in addition to the Kou Fen and boy is steaming and sifting it a pain. Water will get into the flour while steaming, but don’t worry about that, just get rid of the watered bits and it becomes hard but just keep sifting and it’s all good in the end. You’ll definitely need more than 5 tablespoons of cold water so just keep adding water in small increments until you have something that is pliable and soft enough. If you want coloured mooncakes, add colouring together with the water, kneading colour into the dough is a bitch.
Mooncakes are, dare I say this, not that difficult to make and it’s fun to boot. Just make sure that you really push (really put that arm strength into it!) the dough into the mould so that the markings come out clear, I didn’t for some of them and the markings turned out quite faint.
If you’re in Singapore, you have to go to Kwong Cheong Thye, they have the most amazing array of mooncake making things, including the traditional wooden moulds and a wide wide variety of fillings that you can try before buying. They even have lotus seed paste with less sugar, which is a plus. My personal favourite is the honeydew paste, so good!
Next thing I’m going to try will be mooncakes with alcohol truffles in the style of my favourite Raffles Hotel mooncakes!


One thought on “My Mooncake Experiment”